Train a Custom OCR Model with DPAN (with Code)
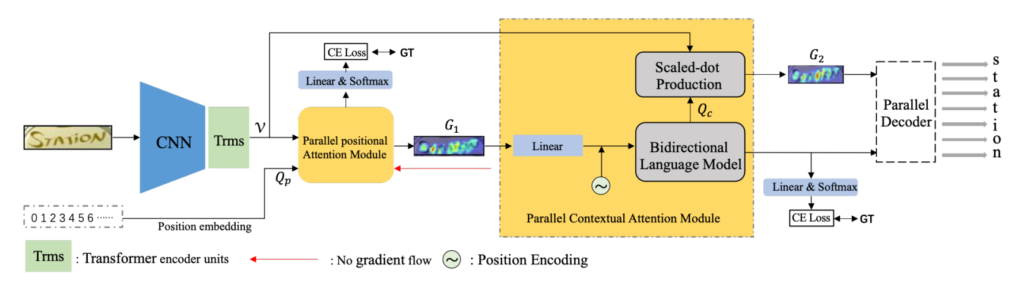 DPAN Model Architecture
I’ve written posts on how to train a custom Optical Character Recognition (OCR) model for two other state-of-the-art Scene Text Recognition models (PARSeq and CDistNet). Although empirically, Dual Parallel Attention Network (DPAN) doesn’t surpass those two models, it may still perform better depending on your use case. So, if the other two didn’t work too well, this one is worth a try.
Steps to prepare for training DPAN
All the changes that I’ve made to get the original repo to work for my use case can be found here. However, you may not need all the changes. So, I’ll discuss each of them below.
1. Clone the DPAN repository
You can find the official repository of DPAN here on GitHub and you can clone it using the following command:
git clone https://github.com/siddagra/DPAN-look-back-Again-Dual-Parallel-Attention-Network-for-Accurate-and-Robust-Scene-Text-Recognition.git
2. Create the dataset
If you, by any chance, already created an LMDB dataset during one of the previous blog posts, then you most likely have everything you need. If not, all you have to do is the following:
-
Download the create_lmdb_dataset.py file from here
-
Complete the “Prerequisites” substep in Step 3 of the PARSeq blog post
-
Depending on your dataset, you may also have to change the
max_vocab_sizein line 400 ofmodels/bert.pywhich denotes the maximum number of characters per image.
3. Create the alphabet text file
- Open
dataset/alphabet.py-
Change the path variable to the path of the text file generated in the previous step. I’ve made this path configurable by environment variables (see the image below).
-
Change the
spliton line 12 to split by “space” rather than by “tab”
-
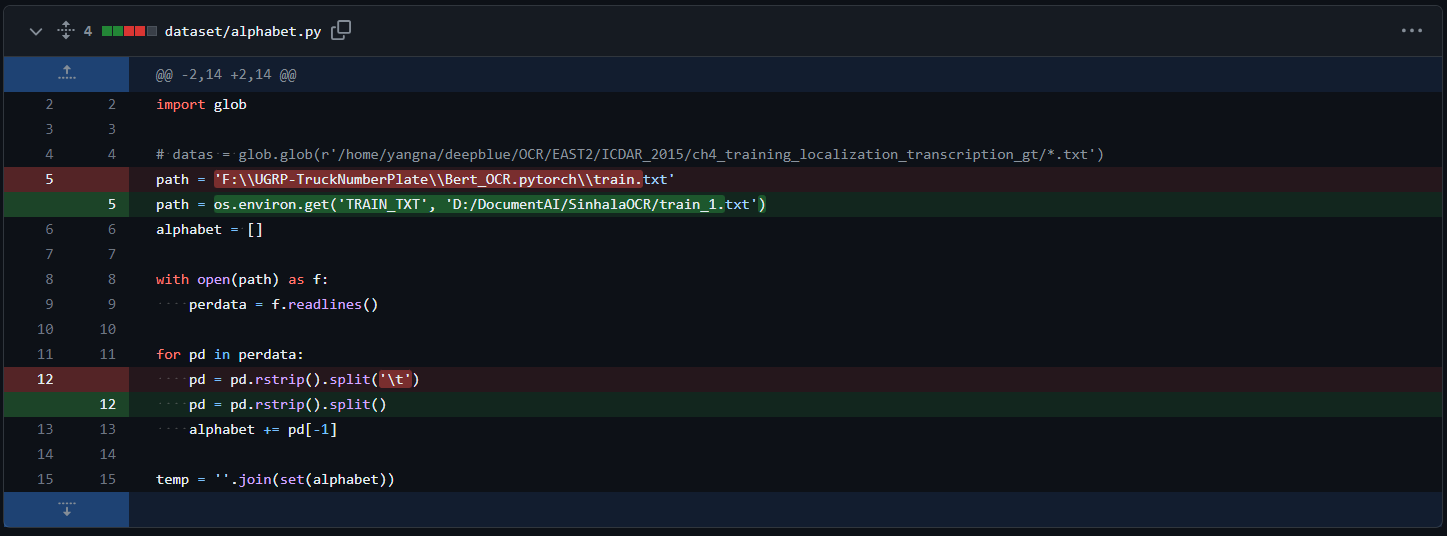 Split change for reading label file to create alphabet
- Open the
src/baidudataset.pyand do the same to thespliton line 80
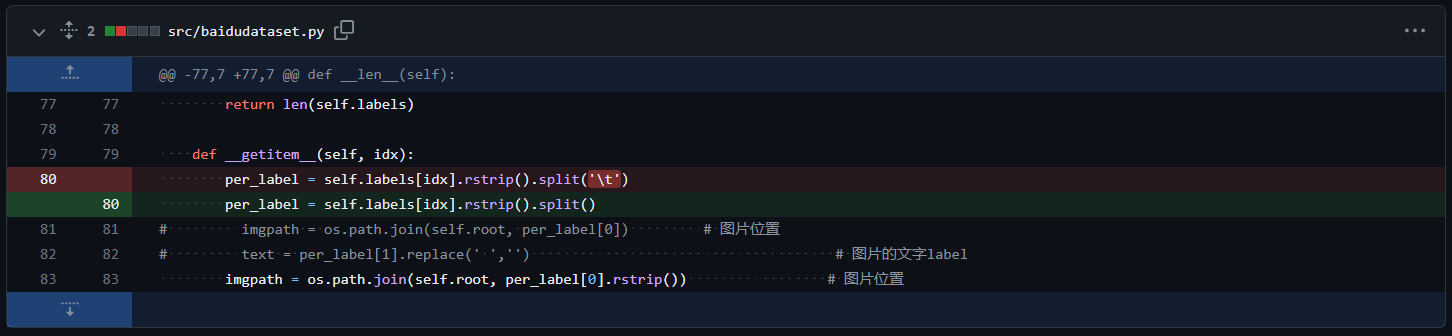 Split change for reading label file
- Generate the alphabet text file using the following command:
python dataset/alphabet.py
4. Change the configurations (optional)
All the variables are configurable using the command line arguments of the train.py file. However, I have changed the defaults to my preferred values for convenience. Feel free to do the same if you wish.
I won’t go into specific details about the attributes I changed, but the below image includes all the changes I made:
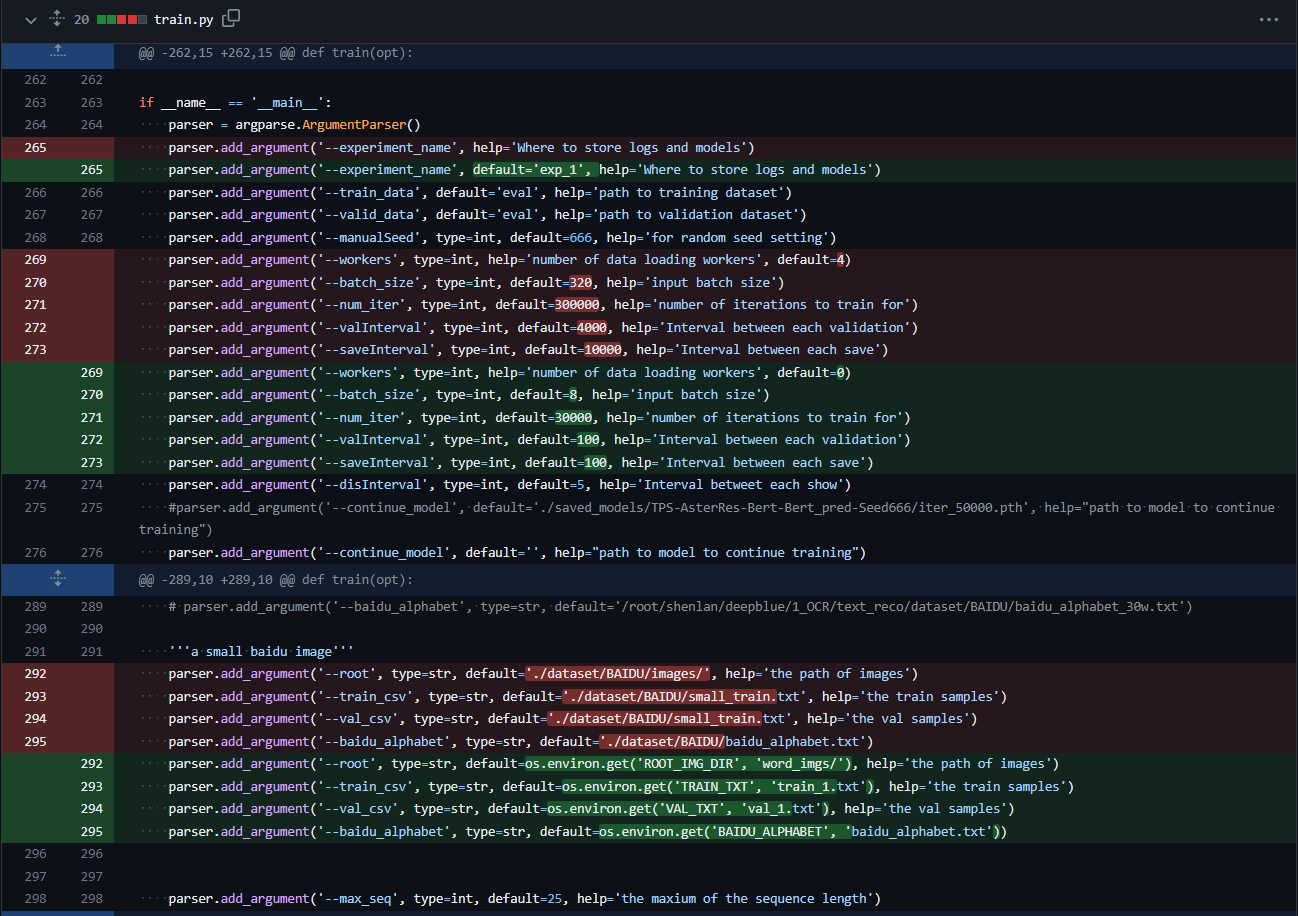 Default configuration changes of DPAN
To summarize, I’ve reduced the default number of workers, batch size, validation interval (how often the validation set should be run), and save interval (how often the model should be saved). Additionally, I’ve also made several arguments configurable by environment variables, for convenience.
5. Use the provided requirements.txt
The original repo did not come with a requirements.txt file, so I’ve created one which you can use here. The given versions should be fine for Python 3.7 and Python 3.8. I haven’t tested it for other versions. To install, simply type the following on the terminal:
pip install -r requirements.txt
Train DPAN
If you managed to setup everything correctly, simply running the following command should start the training process:
python train.py --experiment_name <exp_name>
During training, the best model for each <saveInterval> epochs would be saved to saved_models/<exp_name>/.
Run in Colab
To train the model on colab, feel free to use the following notebook. To do so, simply change the path names to the name of your fork of the original repo and you should be good to go. Note that in my case, I’ve uploaded the dataset zip file to GitHub itself, but you may need to upload it separately to Colab (or to google drive) and change the path accordingly.
Final Thoughts
All done! Hope you’ll find this post useful. Also, feel free to ask about any issues you may run into. Finally, if DPAN didn’t work too well for you, then check out this blog post, which includes links to train a custom model using several other SOTA models like PARSeq and CDistNet.