A VR Image using OpenCV and Blender
VR comes in many different shapes and sizes (literally). I wasn’t quite sure what to call this but I finally landed on the phrase VR image. This article is primarily intended to be a record of what I tried (in case I need it later), but please feel free to take a look around. There’s a small demonstration at the end.
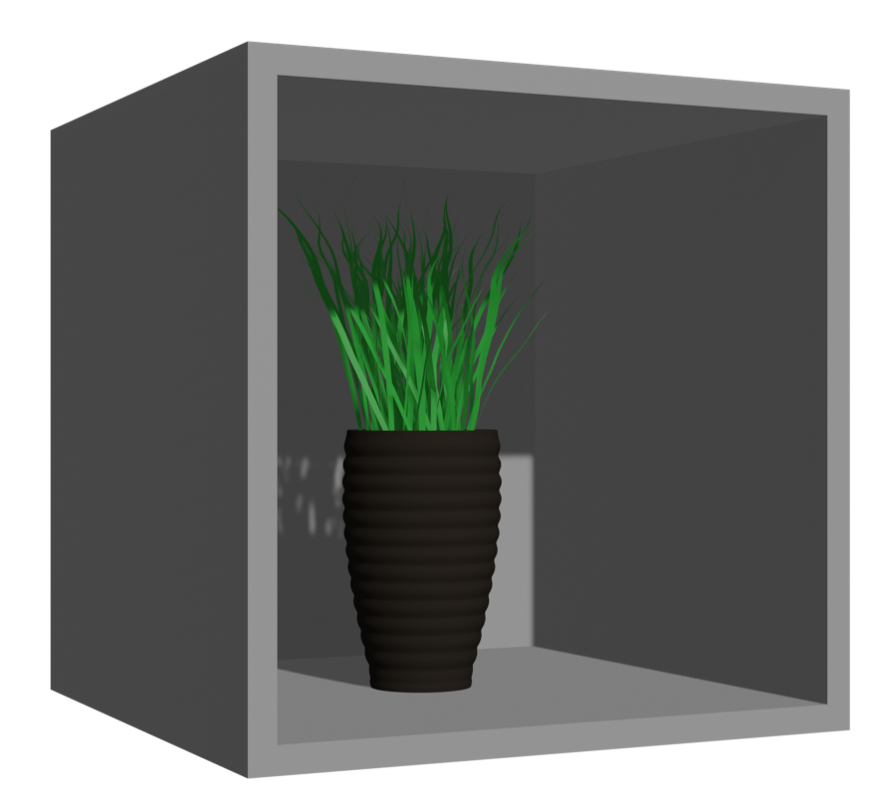
An image of the 3D model to be used
What in the world is a VR image?
I don’t know to be honest. I tried googling “VR image” and I’m pretty sure that none of the results are even remotely related to this. But I went with it anyway because it sounds cooler than “3D-looking thingy”.
Anyway, here’s how mine works: The program tracks the location of the head and then displays an image of the 3D model at a certain angle, based on the head’s location.
This may sound fairly simple. However, simply displaying the rendered image wasn’t sufficient when it’s at an angle. Why? It’s because what we see is actually a perspective view and this should be accounted for in order for the view to seem realistic to the user.
https://www.youtube.com/watch?v=qIxrK8JtEMg
Results without warping
What I did
- I created a simple 3D scene, with a cube with one side open and a vase placed inside the cube.
- I set the camera to always point at the cube and programmed a python script inside Blender to always position towards it while maintaining a constant distance from the cube.
- Next, I programmed the camera to move in small increments, rendering the camera view at each location. First, I tried using fairly large increments but the video output seemed quite jerky. So I decided to go with smaller increments. This is not the most space-efficient method as I now have 600 images in a folder. However, I had no choice but to do it this way due to the issue with the perspective, I previously mentioned.
- I found a python script online that uses OpenCV to warp any quadrilateral into a square. I altered it such that I could loop over the images, select the corners of the face of the cube, warp the image, and save it into a folder.
- Next came the most tedious and time-consuming part. I went through 600 images and manually selected the points that represented the corners of the open faces of the cubes in each image. If I understood the Blender rendering system enough, I could probably automate this step. Maybe someday I will.
- Afterward, I wrote the code for face detection using OpenCV and the pre-trained haar cascade model. For this, I decided to step out of my comfort zone and write the code in C++. Using C++ also meant that I had to install OpenCV for the entire system instead of just pip install for python. I decided to go with building from the source. After multiple failed attempts of using Visual Studio Code and Code::Blocks to compile any OpenCV program without a linker error, I decided to give Microsoft Visual Studio a try which was also a program I wanted to familiarize myself with. Fortunately, this worked great. So, two birds with one stone.
- Now all I had to do was to determine the correct image out of the warped images (depending on the location of the head) and display it.
And lo and behold, it’s finally working.
https://www.youtube.com/watch?v=gLbBX8FHkdY
Results with warping
It does still seem a little bit jerky. I can think of 2 possible reasons for this.
- The slight irregularities in face detection.
- The human error on my part when marking the corners: Automating this step solves this problem as previously mentioned.
As I mentioned in the beginning, I wrote this just for the purpose of keeping a record of this project so there’s probably nothing much that a reader can gain from reading this. Unless you’re looking to make something like this by yourself, in which case, go for it. :)
If you would like to see more similar posts, head over to the Projects section of my blog. Thanks for reading!